I am teaching for the second time a class on Python — Python for the Geosciences. It went well last semester, but I felt that too much time was spent on getting stuff installed on student machines, despite using Anaconda. (Much of this was due to Mac vs. PC behaviors.) This semester, I am trying to avoid installation issues on the student end by having them sign into a JupyterHub server, which is being run off a local workstation. I like it for the most part, though installation issues have not been trivial, particularly in coordinating JupyterHub and nbgrader, the really nice setup for distributing assignments to students so that they can work on them, check their work, and submit them, and so that I can subsequently grade them easily. I graded submitted notebooks "by hand" last semester and it was a nightmare, so avoiding that was a big goal this semester.
As far as I understand, one of the main pain points for getting this all to work is the fact that we are trying to stay more secure, with an https address for the server. I'll describe here the steps I took in case it might help future me or someone else out there. Note that I'm starting after the point of getting the JupyterHub server installed and setup.
Set up student accounts on workstation for server
With about 10 students in the class, it was annoying but not too hard to setup an account on the workstation for each of them. I used their student email nickname for their login, and made them part of a group so that I can use the group name for adding permissions and deleting them after the term is over. I chose their passwords for them since I wanted to be sure they had strong passwords. I am keeping track of them on my own (I use 1password to keep track of all this sort of thing, as well as generating passwords), and I read somewhere that sending someone a link to a public dropbox file is a relatively secure way to send information, so I made a file for each of them with their username and password and emailed it off.
    sudo groupadd pythonfall2016  # create group
    # home directory is on a separate drive on this workstation
    sudo useradd -G pythonfall2016 -d /d2/home/student_username_here student_username_here
    sudo passwd username  # give them each a good password
I had to log into each account to set up a "notebooks" directory, which is where JupyterHub was setup to start. (This is controlled in your JuyterHub config file jupyterhub_config.py by the variable c.Spawner.notebook_dir = '~/notebooks'.)
I then added the group pythonfall2016 to the authenticated list in jupyterhub_config.py so they would be able to log in: c.LocalAuthenticator.group_whitelist = {'pythonfall2016'}.
nbgrader
nbgrader_config file
This is what I needed in my course ngrader_config.py file to get things to work. I triangulated between what is in the nbgrader docs and what I found on various google groups discussions and some github links I stumbled across.
    import os

    c = get_config()

    # You only need this if you are running nbgrader on a shared
    # server set up.
    c.NbGrader.course_id = "course_name"

    # Update this list with other assignments you want
    c.NbGrader.db_assignments = [dict(name="hw1")]

    # Change the students in this list with that actual students in
    # your course
    c.NbGrader.db_students = [
        dict(id="pythontest", first_name="P", last_name="pythontest")
    ]

    #------------------------------------------------------------------------------
    # FormgradeApp configuration
    #------------------------------------------------------------------------------

    # IP address for the server
    c.FormgradeApp.ip = "127.0.0.1"
    # Port for the server
    c.FormgradeApp.port = 5000
    # Authenticator used in all formgrade requests.
    c.FormgradeApp.authenticator_class = "nbgrader.auth.hubauth.HubAuth"

    # from https://groups.google.com/forum/#!topic/jupyter/oTRM4XuRUew
    # for running with https
    # this line made it so the page was rendered nicely and actually connected
    # to the class database properly (instead of the localhost)
    c.HubAuth.hub_base_url = "https://copano.tamu.edu:8000"
    c.HubAuth.notebook_url_prefix = "course_name"
    c.HubAuth.graders = ["my_user_name"]
    c.HubAuth.hubapi_token = os.environ['JPY_API_TOKEN']


    # The nbgrader exchange directory writable to everyone. MUST be preexisting.
    # this is the default location for the exchange directory
    c.TransferApp.exchange_directory = '/srv/nbgrader/exchange'
getting the authorization token setup for using formgrader
This has ended up being rather kludgey and I am sure there is a better way, but we ended up needing to change users to jupyter, the user that owns our JupyterHub server, in order to generate the necessary authentication token so that the nbgrader formgrade command would work, but generate the token in my username as the one who is actually authenticated to grade within the system. More information can be found from research scientist Steve Baum. Here is what we do:
    sudo -i -u jupyter
    [password]
    export JPY_API_TOKEN=$(/usr/local/bin/jupyterhub token --db=sqlite:////etc/jupyterhub/jupyterhub.sqlite -f /etc/jupyterhub/jupyterhub_config.py my_user_name)
    env | grep JPY
    JPY_API_TOKEN=[token]
    exit
    # Stick these into my .bash_profile
    export CONFIGPROXY_AUTH_TOKEN='[token goes here]’
    export JPY_API_TOKEN=[other token from jupyterhub setup]
A little more setup
Note that the default exchange server is located at:
c.TransferApp.exchange_directory = '/srv/nbgrader/exchange'
I made the directory and then made it read and writeable by everyone with:
chmod ugo+rw /srv/nbgrader/exchange
I installed the nbgrader extension, but did it separately for me and for the students so that I would get both the Assignments tab and the ability to choose Create Assignment in my notebooks, but the students will only gain the Assignments tab.
For me as grader and assignment-maker:
    nbgrader extension install --symlink --user
    nbgrader extension activate
For students:
    nbgrader extension install assignment_list --user
    nbgrader extension activate assignment_list
Now we want to actually do the assignments. Here is my summary of the steps, based on the nbgrader docs.
Instructor perspective
Start your course directory within your notebooks directory, or wherever is the landing pad for JupyterHub within your directory. I'll use oncg669 as my course id and name.
nbgrader quickstart ocng669
This creates a directory with the basic stuff you need in it. All other nbgrader commands will need to happen inside this course directory.
- Make your homework assignment following the examples. The examples were plenty helpful for me to follow.
- Assign the homework, using the nice header that is included in the directory:
nbgrader assign hw1 --IncludeHeaderFooter.header=source/header.ipynb - Inspect the release folder (release/hw1) to make sure it looks right.
- Release the assignment to the students, so they can actually access it:
nbgrader release hw1 - Make sure it has gone out ok:
nbgrader list
Student perspective
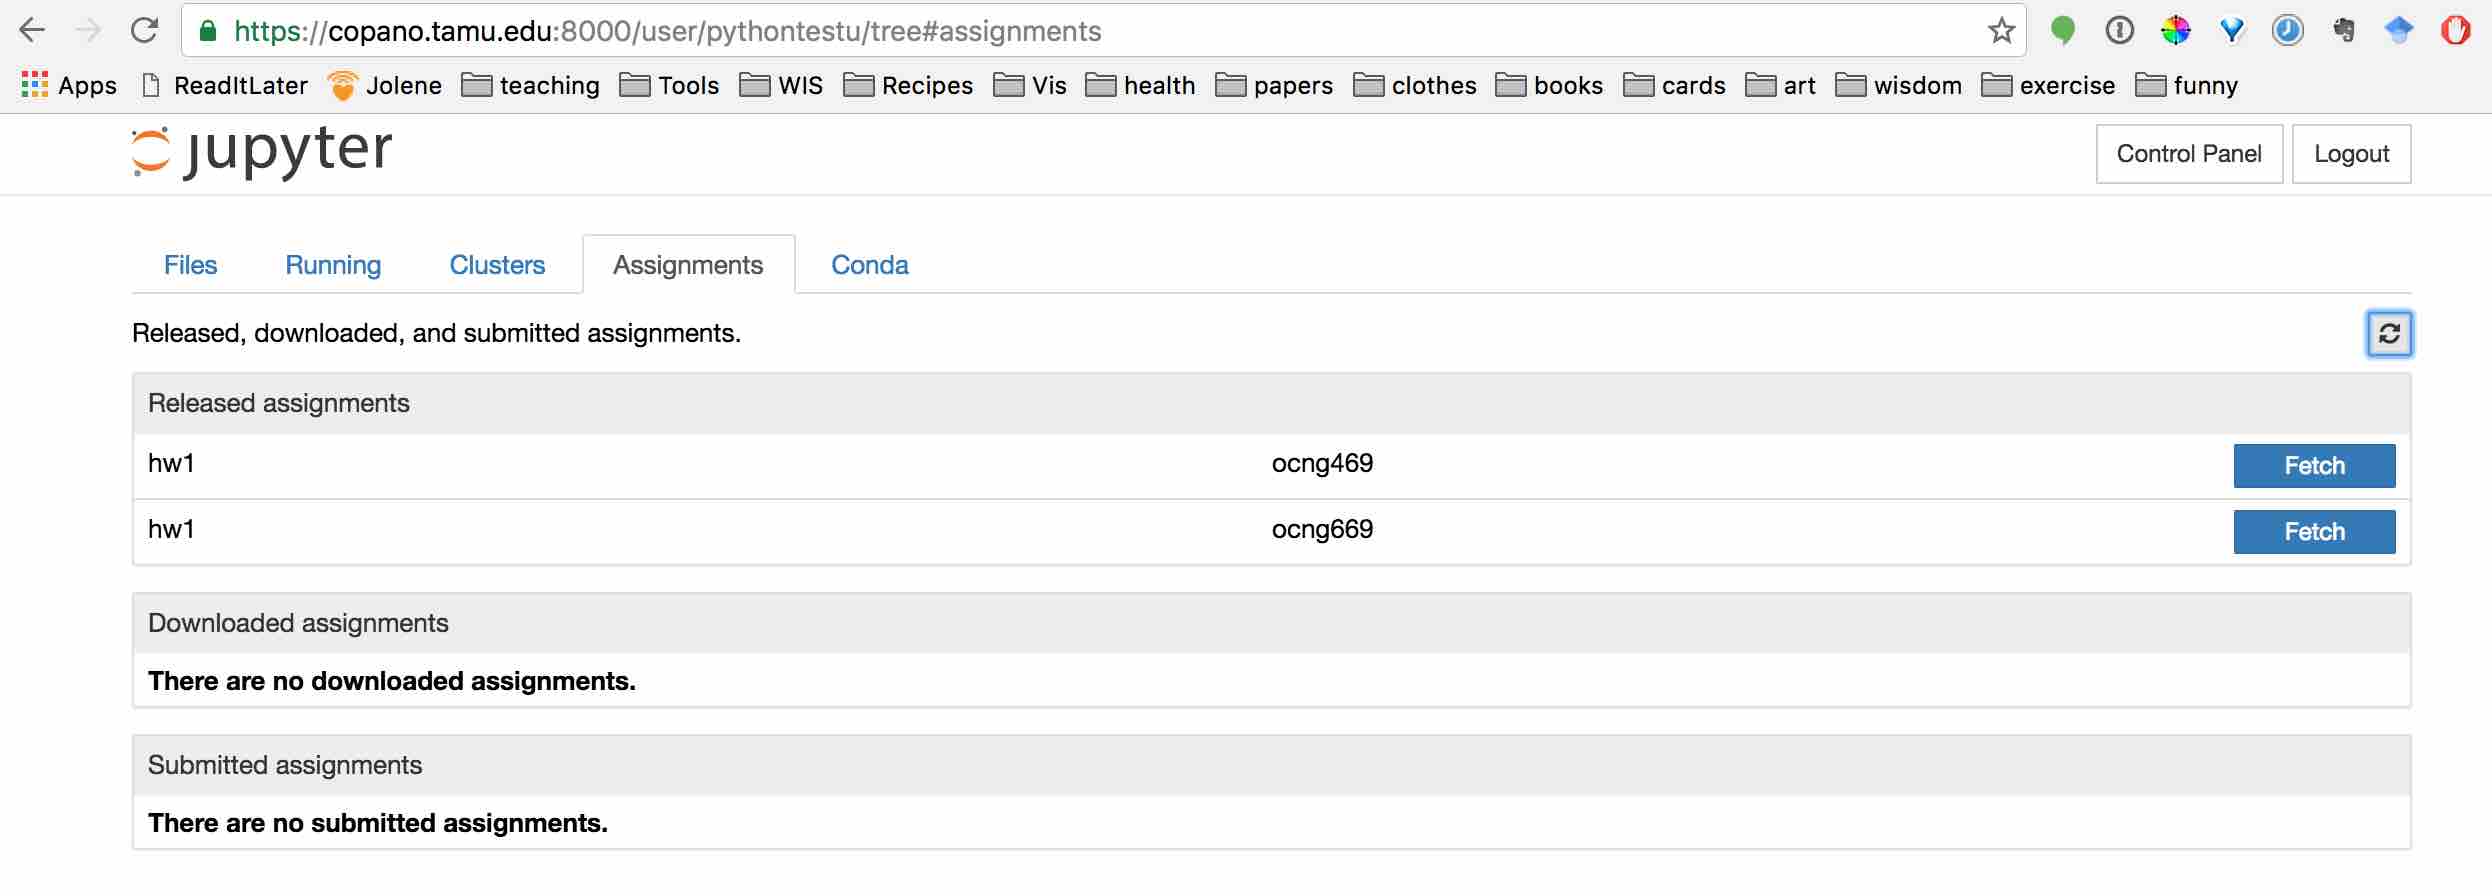
Once the assignment has been made available by the instructor "releasing it," the student can access it by signing into the server, clicking on the Assignments tab, and clicking on the blue button to Fetch the assignment. In this case, I have two classes appearing with an assignment to be fetched.
After they have fetched the assignment, it will appear under Downloaded assignments. There, they can click on the assignment name, which is a link, to see the notebooks inside, then click on each to open and work on them.
- they can run the cells;
- they delete the exception where it says to enter their code, and then enter their code;
- after entering their code, there will be cells with test statements to check their work. They can and should run these to make sure their code works, then fix it if it doesn't;
- After finishing a notebook, they can go back to the server page and click to validate that notebook, which runs all of the test cells and states if there are any errors. They can do this as many times as they want;
- The system will note when the assignment is submitted, so they need to turn it in on time.
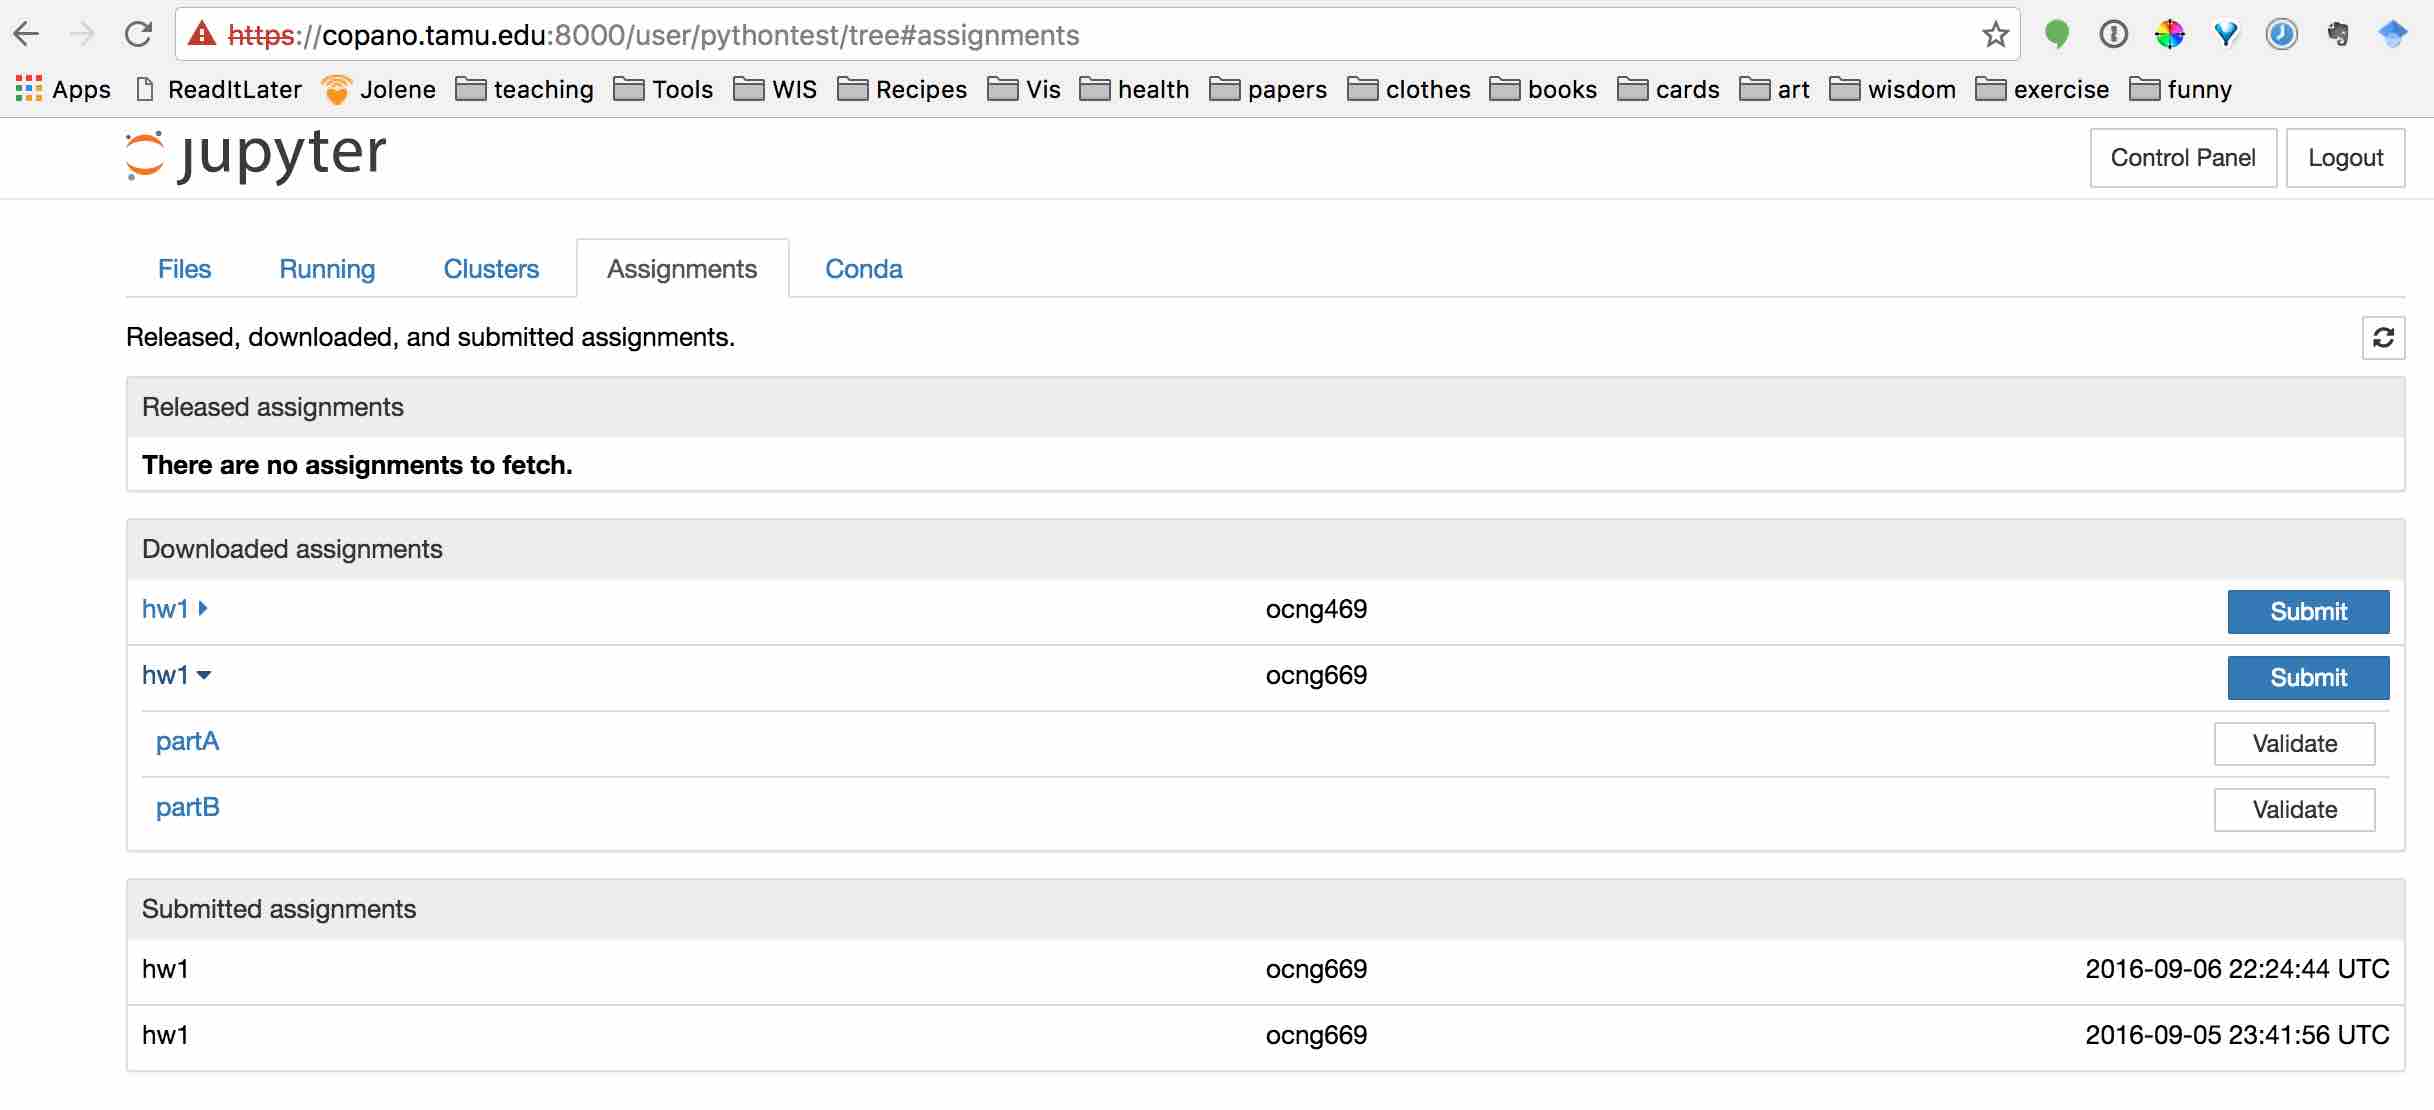
Now the students can submit! They can do so however many times they want and just the last one will be used for grading;
Instructor perspective
- After students have submitted their assignments, the instructor can view what has been submitted with
nbgrader list --inbound - Collect all submitted assignments with the following — This will copy the student submissions to the submitted folder in a way that is automatically compatible with
nbgrader autograde
nbgrader collect hw1 --course ocng669 - Autograde. Note that after assignments have been autograded, they will saved into an autograded directory
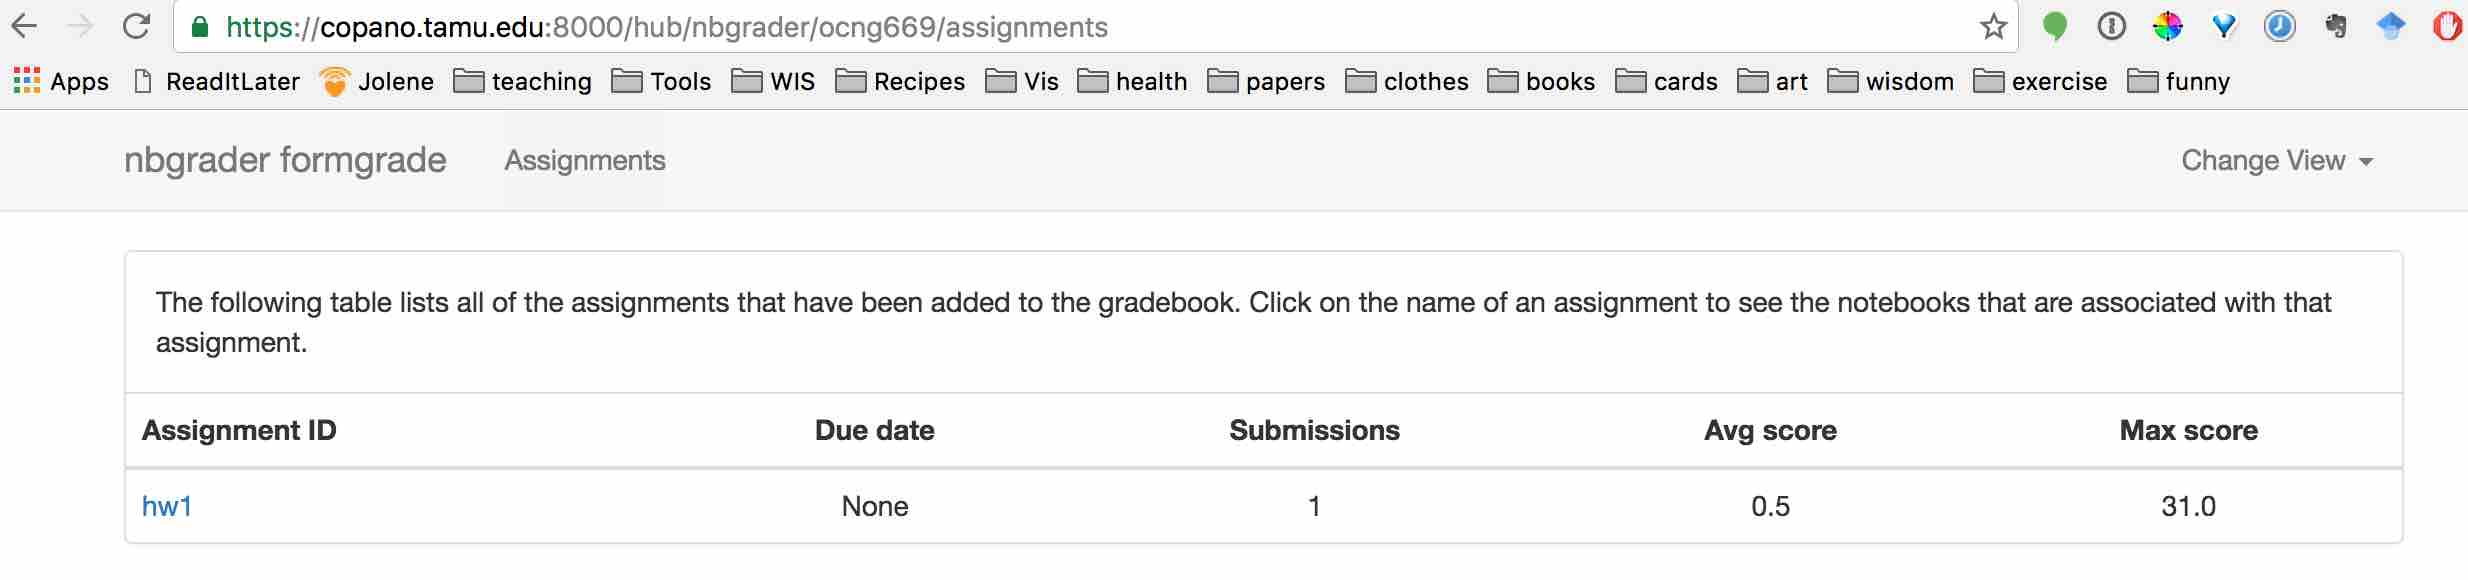
nbgrader autograde hw1 - Manual grading. To grade the assignments with an HTML form (assuming you got all the linking done properly), all we have to do is run the following and then see it at the link:
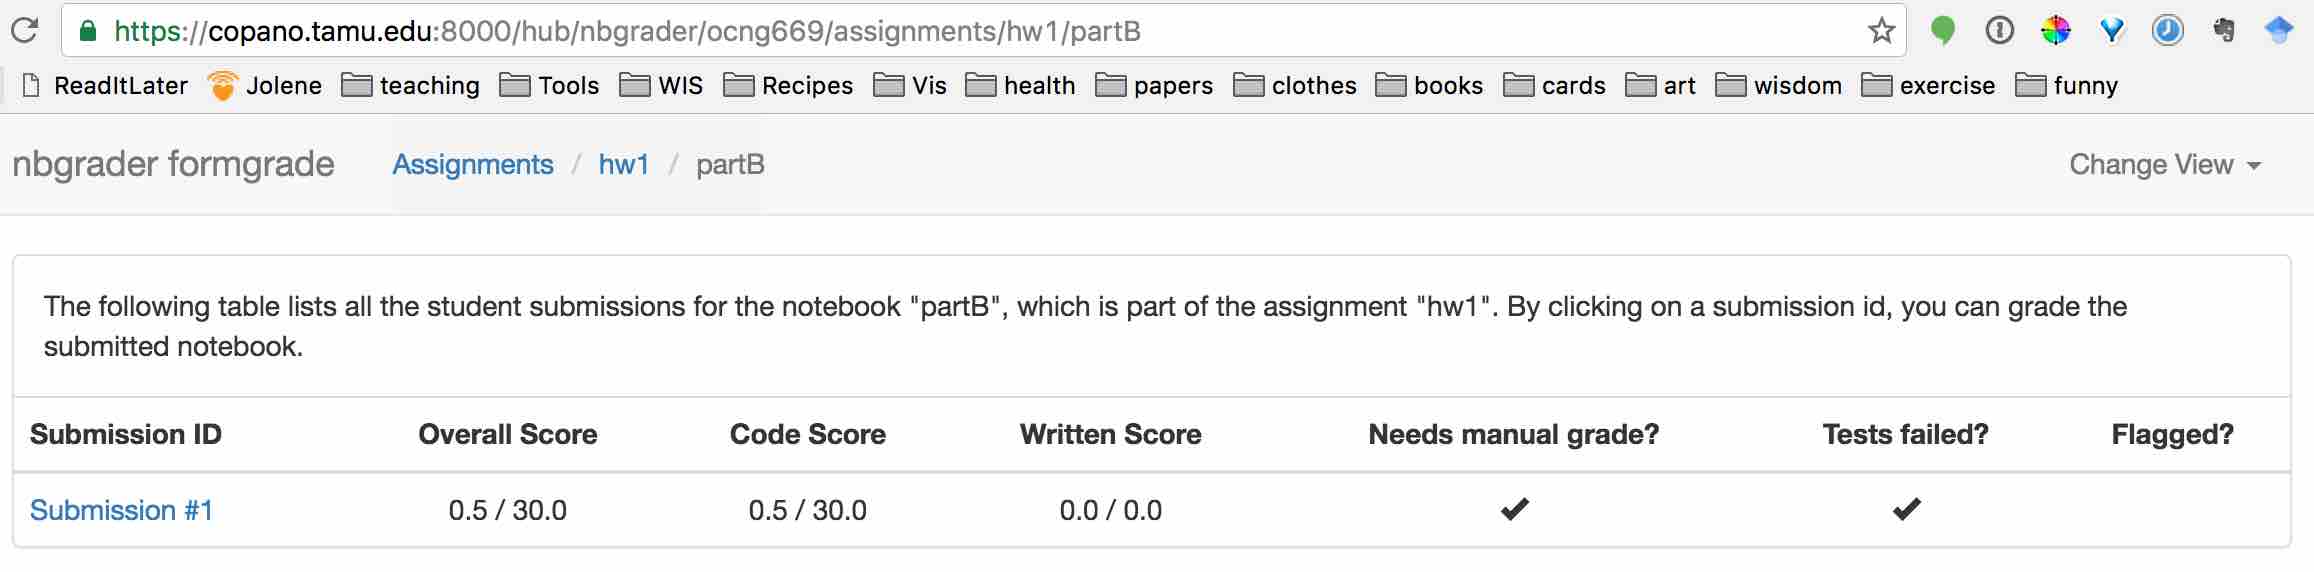
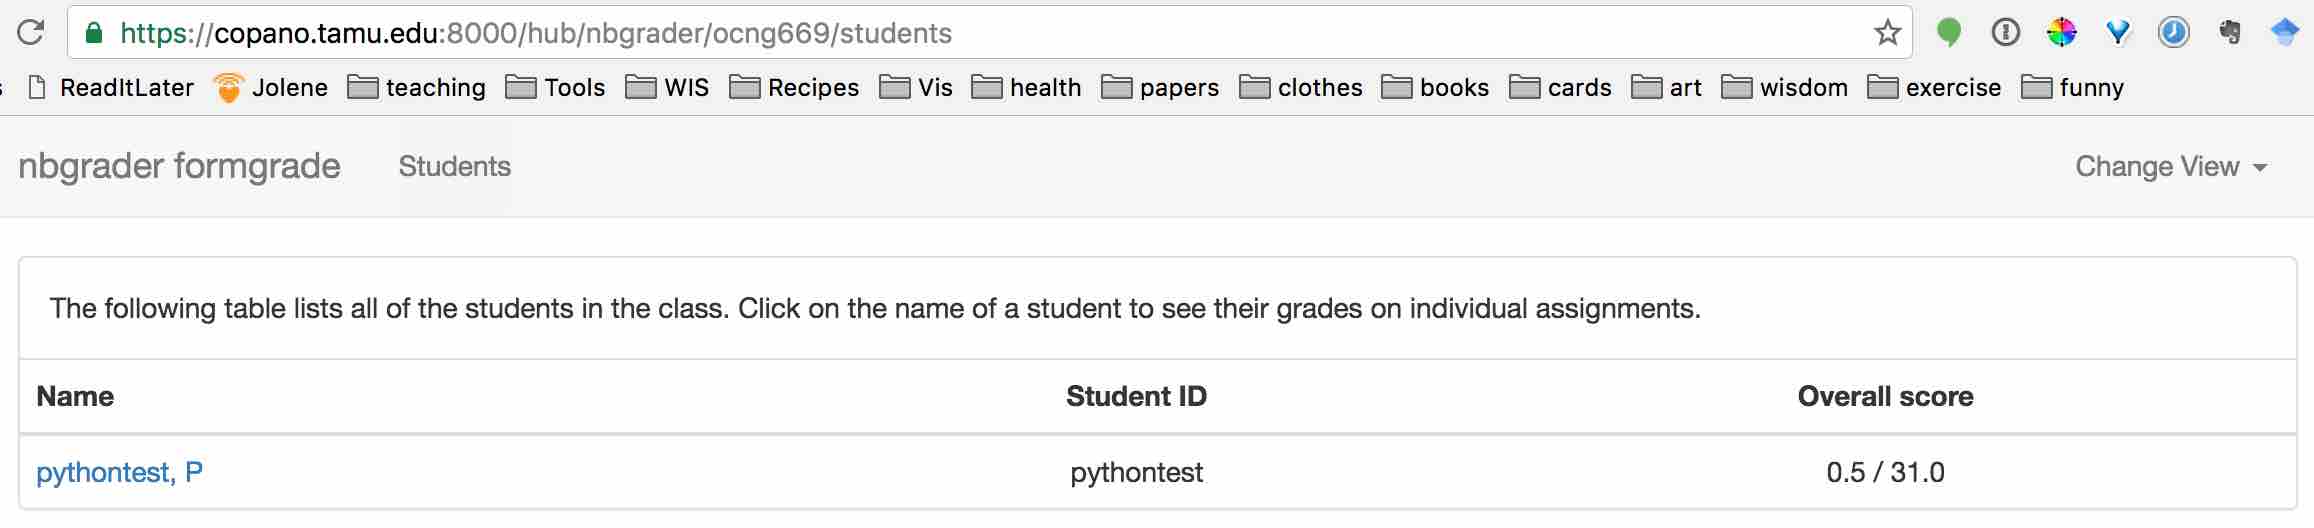
https://copano.tamu.edu:8000/hub/nbgrader/ocng669. This is a really slick system for taking the pain out of any necessary manual grading. Some snapshots of what formgrade looks like in practice are shown below.
nbgrader formgrade - feedback: After assignments have been autograded and/or manually graded, they will located in the auto graded directory, and after feedback step: HTML versions of these notebooks will be saved to: feedback/{student_id}/{assignment_id}/{notebook_id}.html.
nbgrader feedback hw1 - The feedback is accessible only by me at this point. There is not a built-in way to get the feedback to where the students can access it, but here is how I am doing it. I found a script that Jess Hamrick, main author of nbgrader, wrote to copy the feedback over to a student’s directory. I have edited it because apparently the file structure in nbgrader changed since she wrote it. I run in from that directory with:
sudo python3 return_feedback.py hw1
and for a particular student,pythontest:
sudo python3 return_feedback.py hw1 --student pythontest
Thesudois necessary because the script copies the feedback file structure over to the student's directory.
Gallery for formgrade
formgrade Assignments
formgrade Assignments > hw1

formgrade Assignments > hw1 > partB
formgrade Students
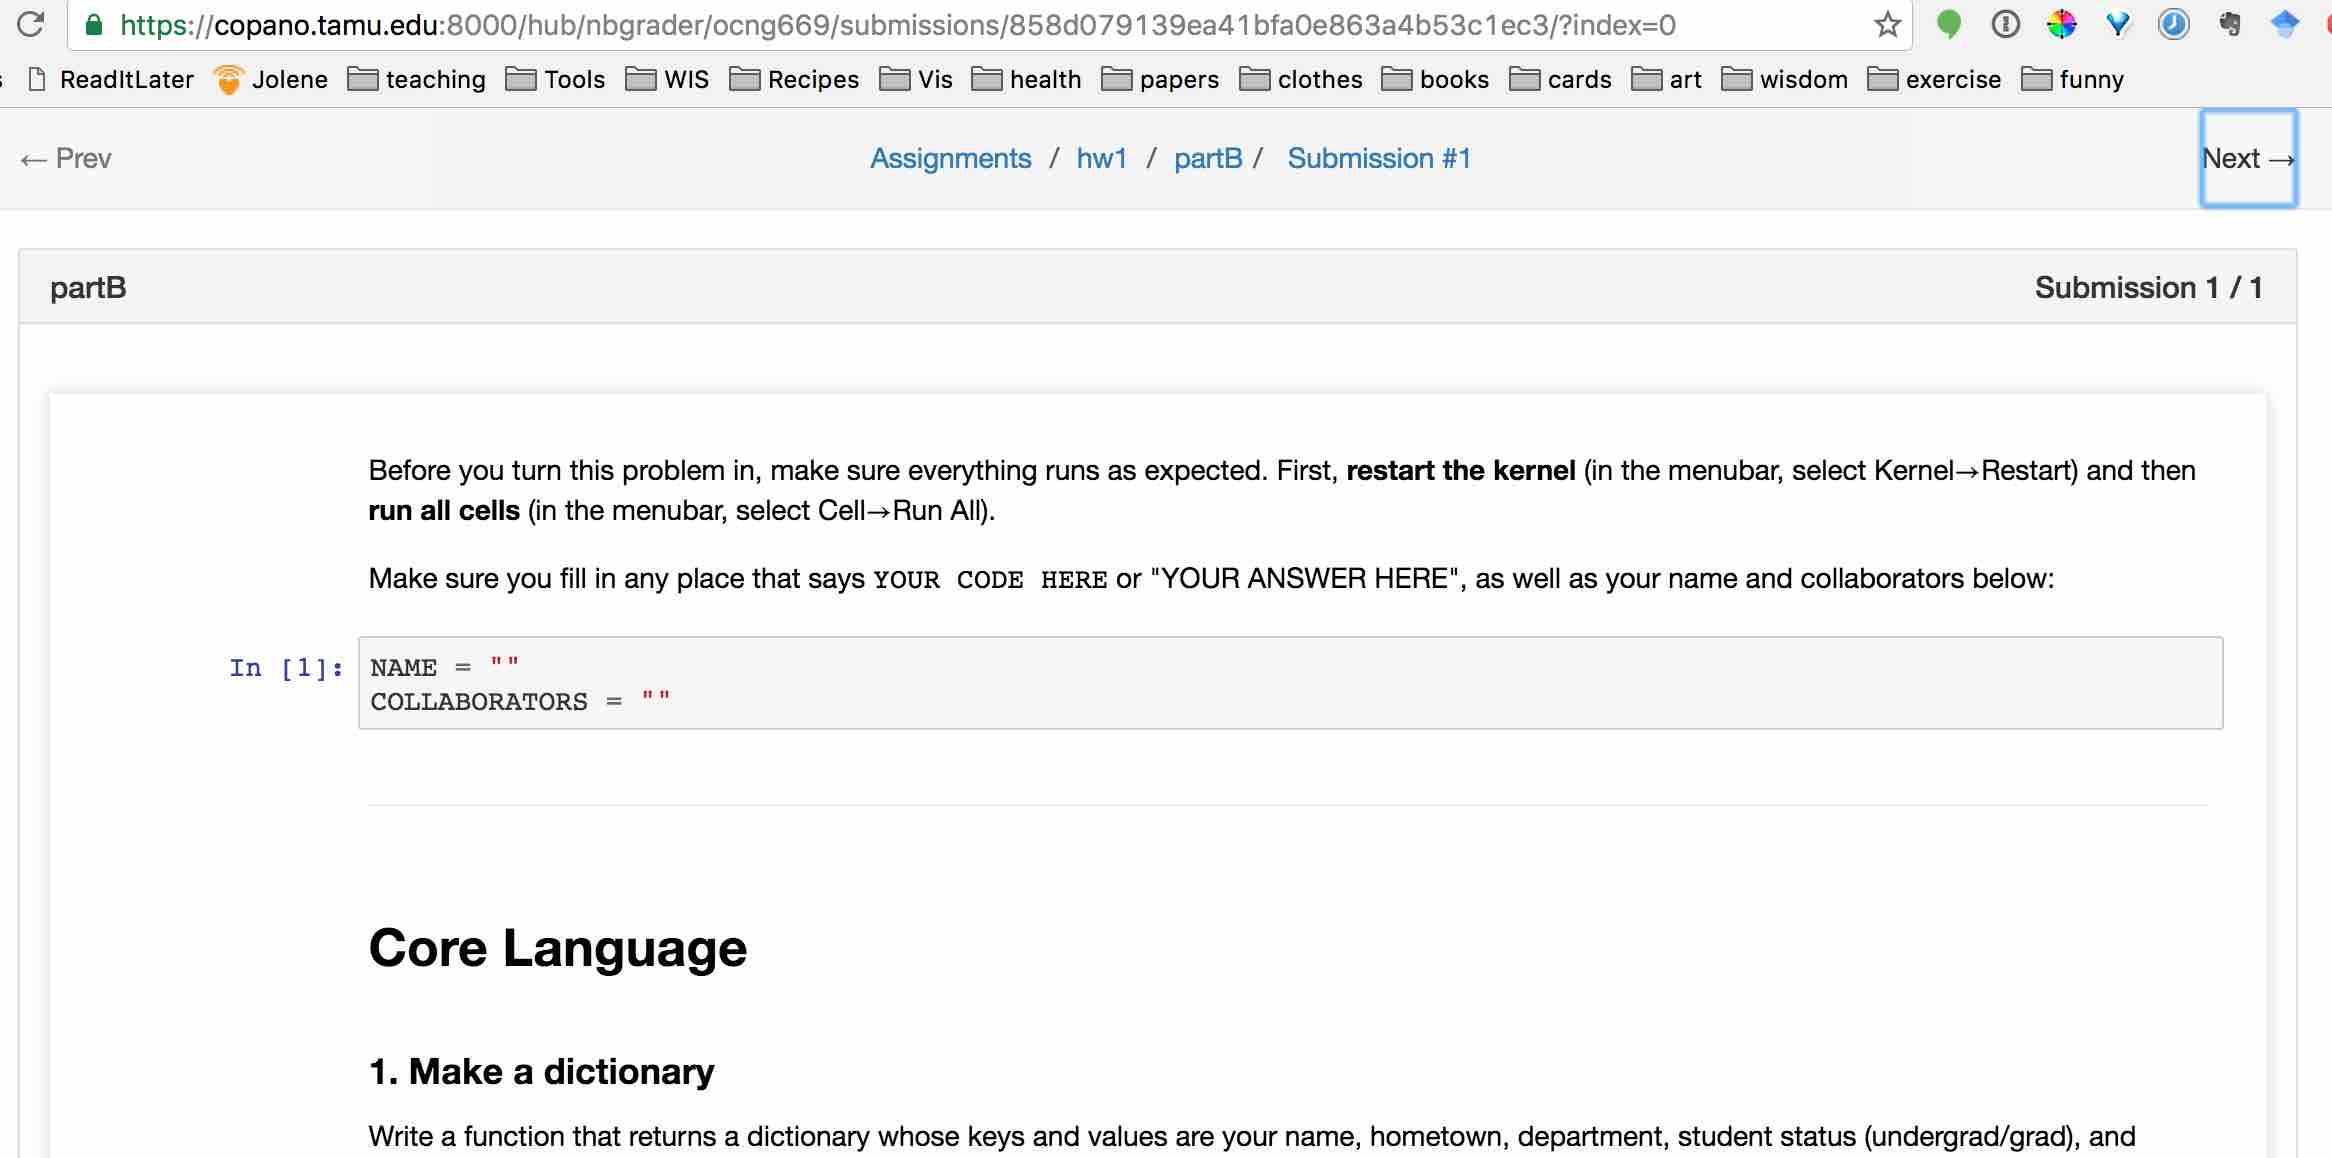
formgrade notebook view
Includes a next button to move quickly between student notebooks!
Student perspective
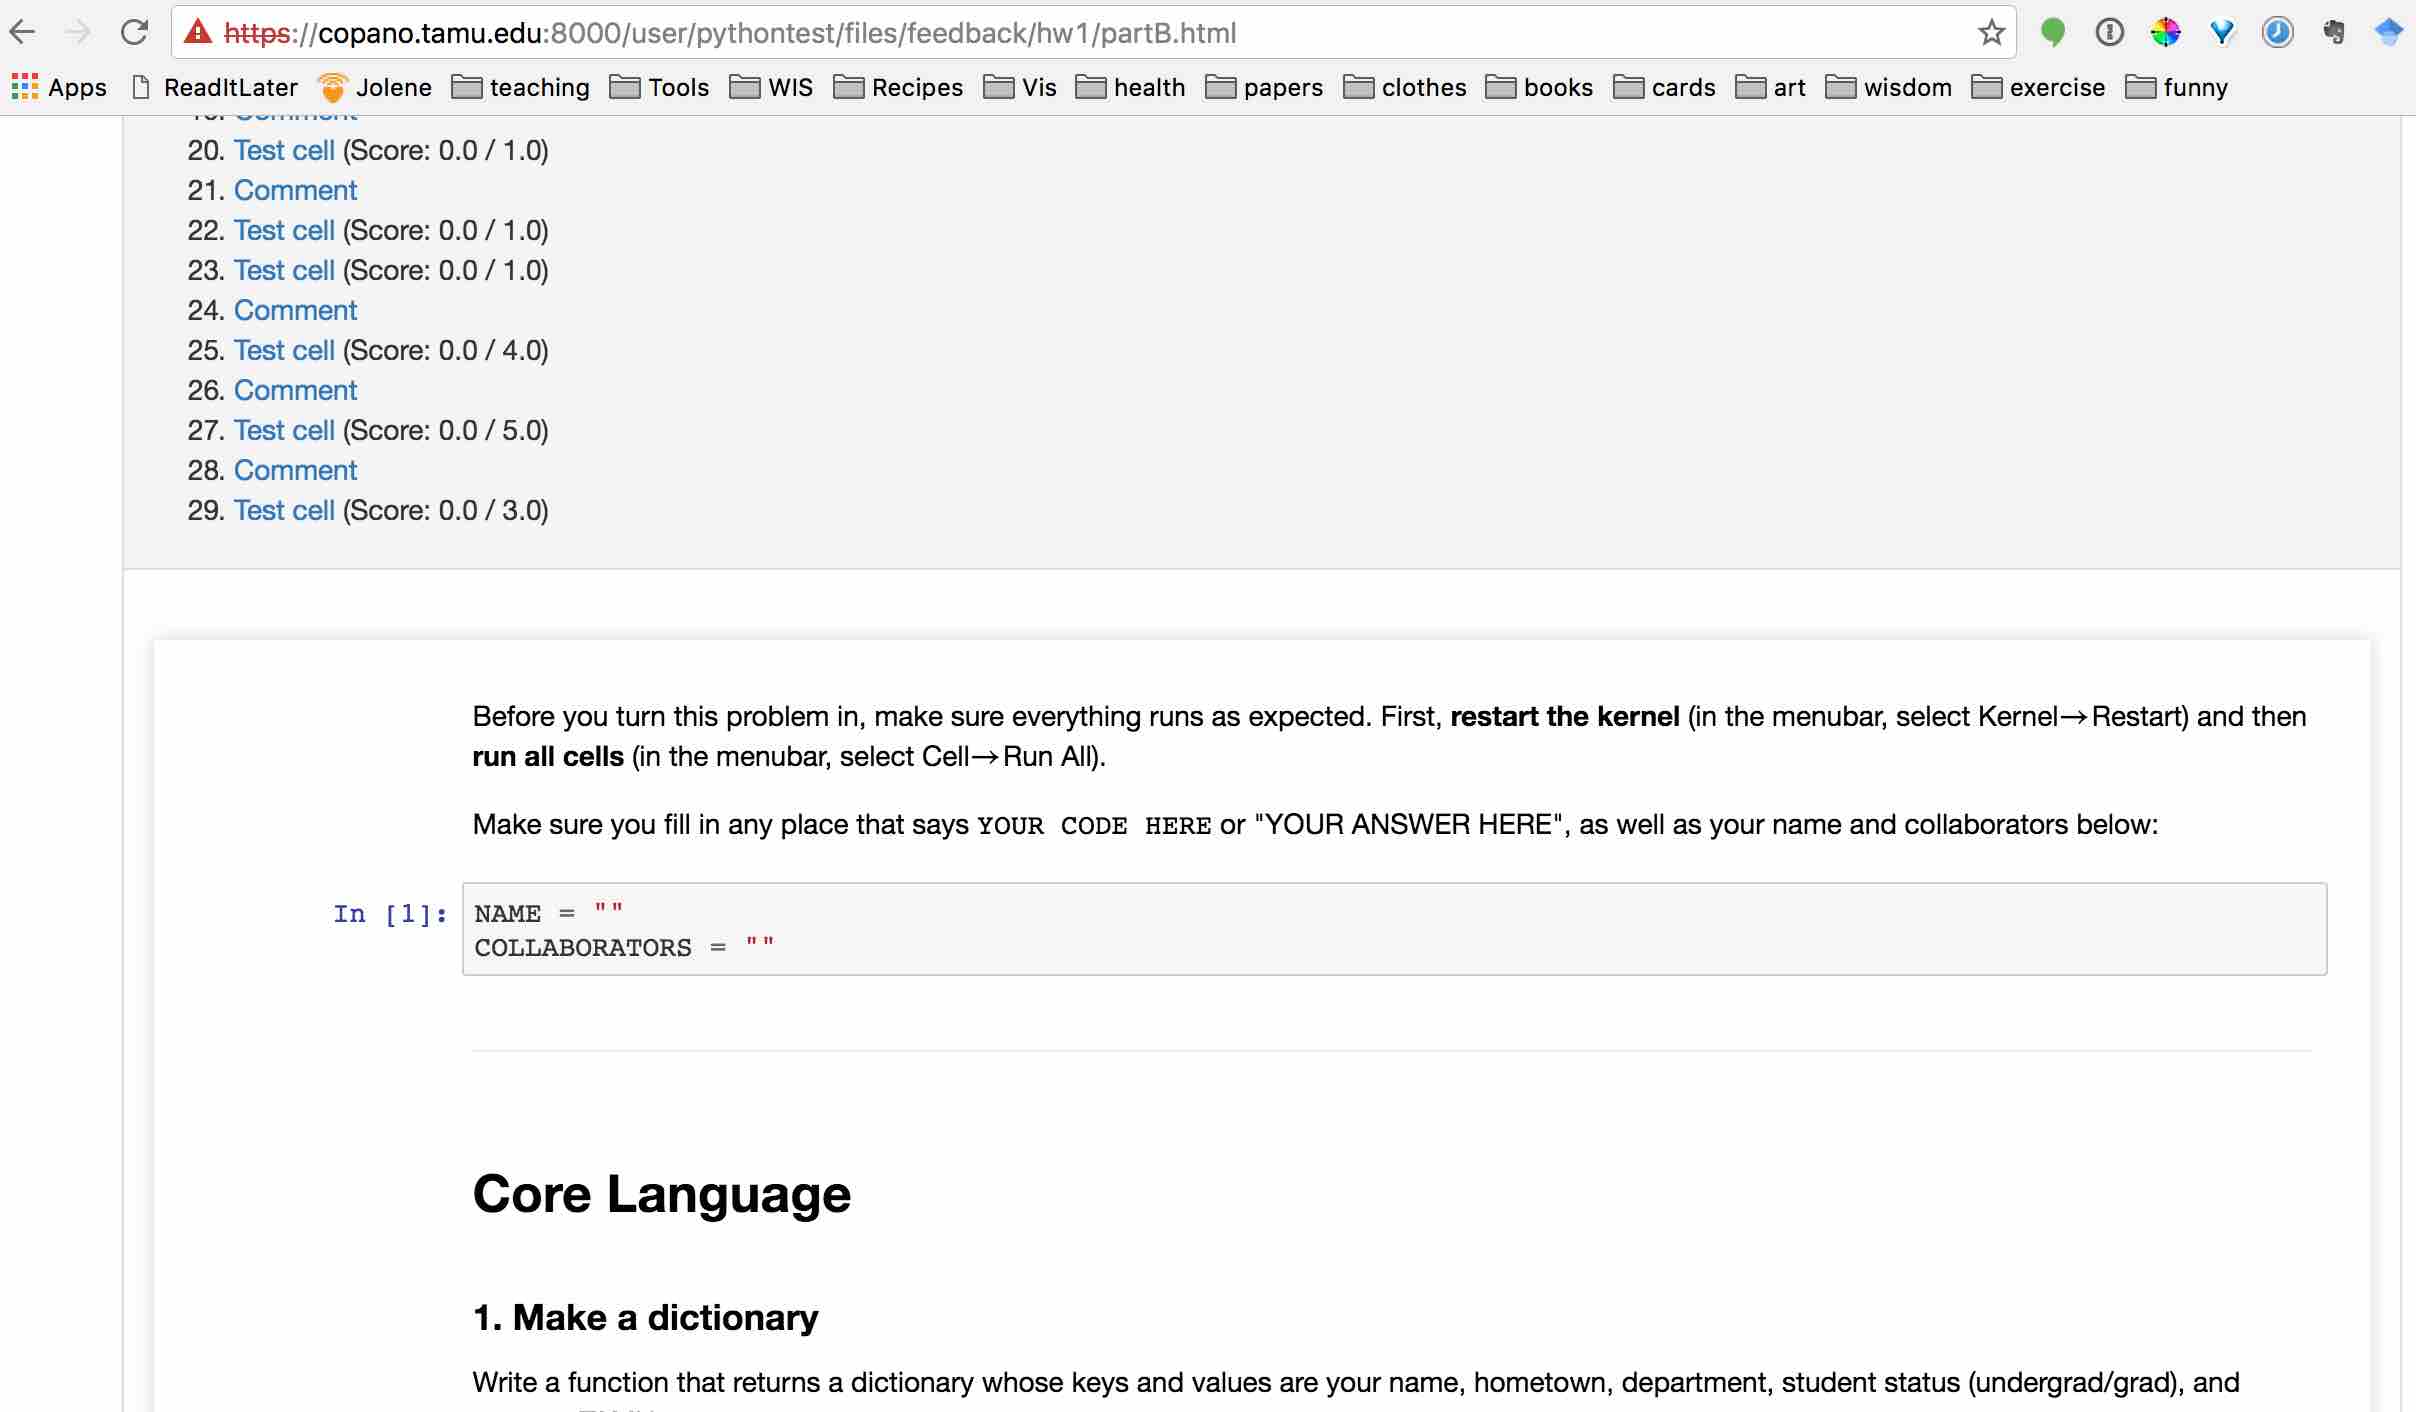
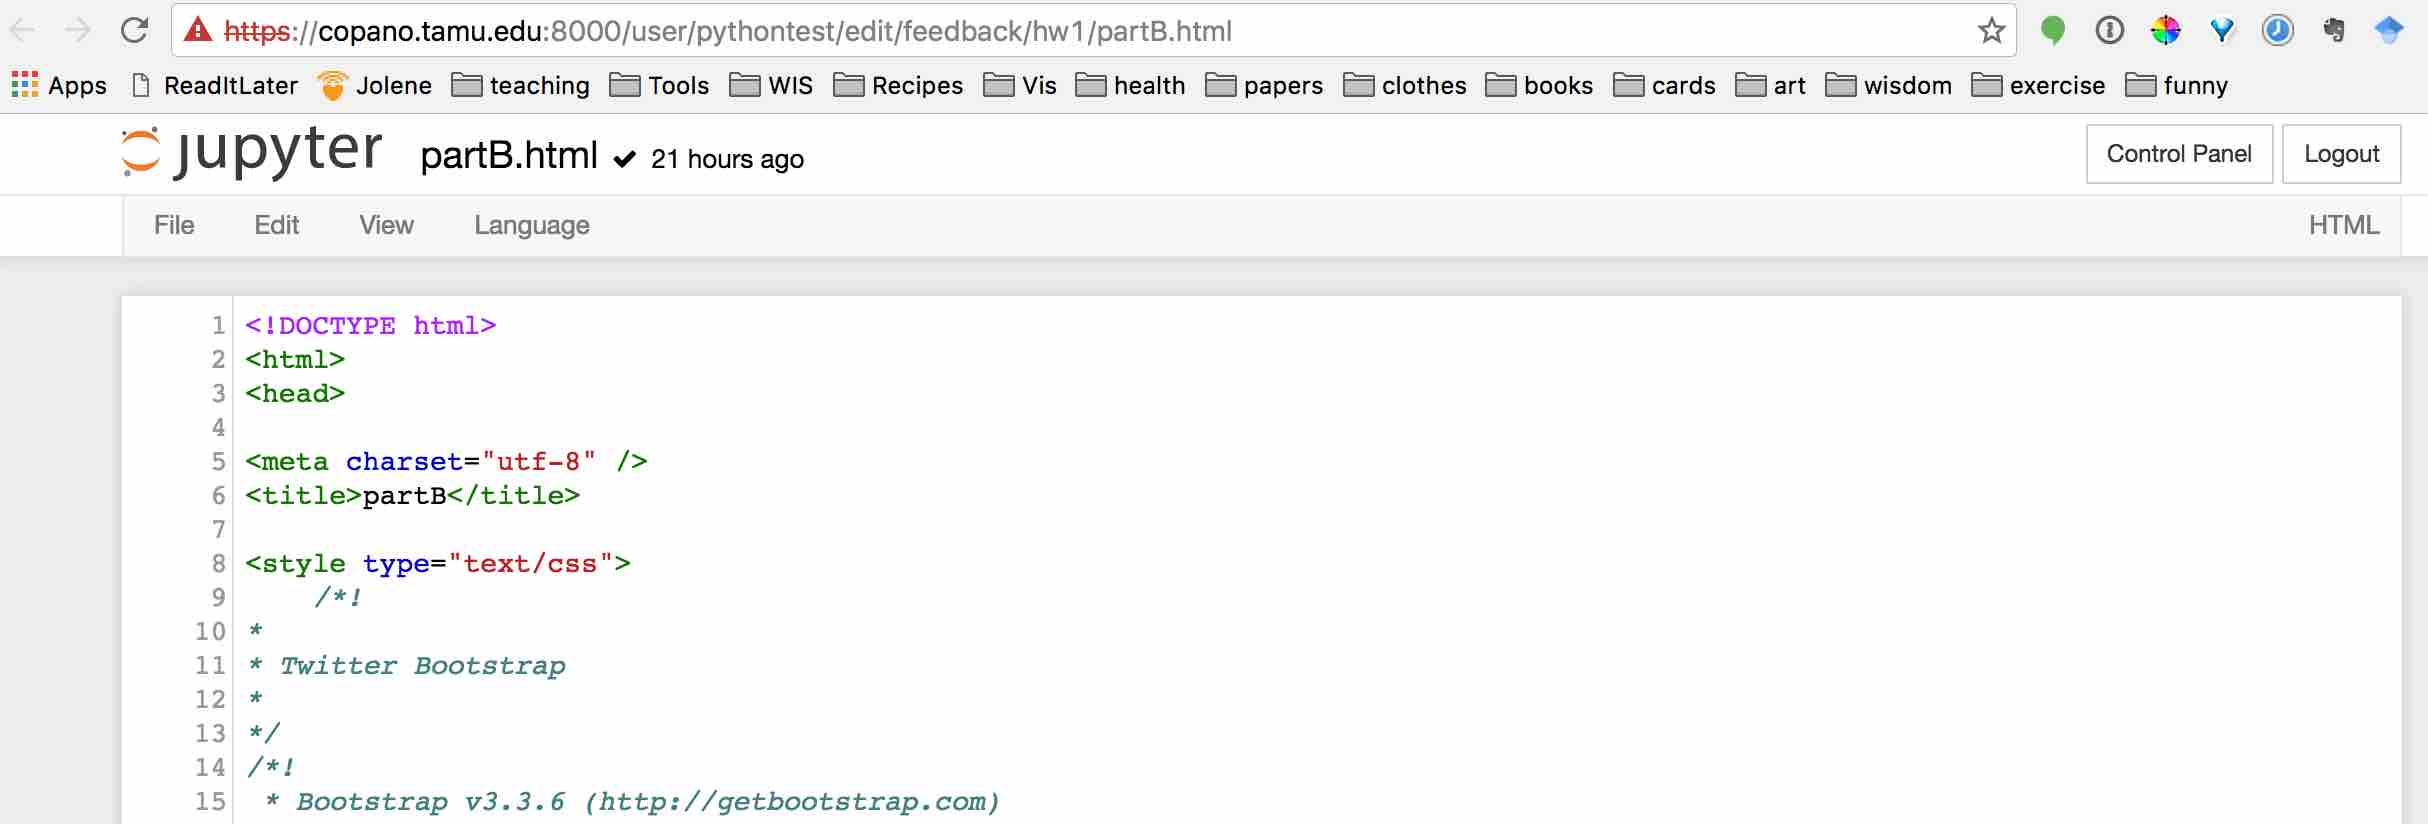
The feedback files will now show up in their base directory in jupyterhub, notebooks, under a folder called feedback, in a labeled homework directory. When clicked on, the files will show up as editable html in the jupyterhub server, but you can slightly edit the address to see them nicely rendered. So you have to change the url from
https://copano.tamu.edu:8000/user/pythontest/edit/feedback/hw1/partA.html
to
https://copano.tamu.edu:8000/user/pythontest/files/feedback/hw1/partA.html
for example.
feedback, unrendered
feedback, rendered
Note that the top of the feedback is a summary of the student's homework, complete with links to the relevant parts of the notebooks. Very cool!